
Suspension setup from scratch
Pressure, sag, rebound, then compression — in that order. One afternoon, one shock pump, and a method you can repeat on any fork or shock.
Most suspension is running someone else’s settings: the shop’s, the previous owner’s, or whatever the factory sticker said for a rider who isn’t you. Fixing that takes half an hour and a shock pump. Do the four steps below in order, because each one only makes sense once the previous one is right.
What you need
- A shock pump (0–300 psi, with a bleed button). A floor pump will not work: the fitting is different and the volume is too big.
- Your riding kit on: helmet, pack with water, shoes. Sag is measured at riding weight, not bathroom weight.
- Something to lean against. A wall or a friend, not a stand.
- MTB Mate with your bike entered: fork travel, shock stroke or rear travel, your weight.
Before you start: find the maximum pressure printed on your fork leg and shock body. Never exceed it. Your components’ published limits override every number in this guide and in the app.
1. Set the starting pressure
Open your setup in MTB Mate. The fork and shock cards show a starting pressure worked out from your weight, your travel and the sag target for your bike type. Set both, in this order:
- Open the rebound dial fully (turn towards the rabbit, or anticlockwise) so it doesn’t fight the measurement later.
- Open the compression dials fully, if you have any.
- Screw the shock pump onto the fork valve until the gauge reads. Pump or bleed to the number on the card.
- Unscrew the pump quickly. The hiss you hear is the pump’s hose emptying, not your fork.
- Repeat on the shock.
- Equalise, the way your manual says. Fork and shock air springs both have a negative chamber that only balances when you compress them. Most Fox and RockShox units want you to cycle slowly through the travel a few times after every 50 psi or so on the way up, then again at the final pressure. The gauge often drops a few psi afterwards: re-check and top up. Your component’s owner manual overrides this generic sequence.
Tap Pump mode on the setup if you’re doing this at the trailhead: big numbers, and a psi / bar / kPa toggle to match whatever gauge you’re holding.
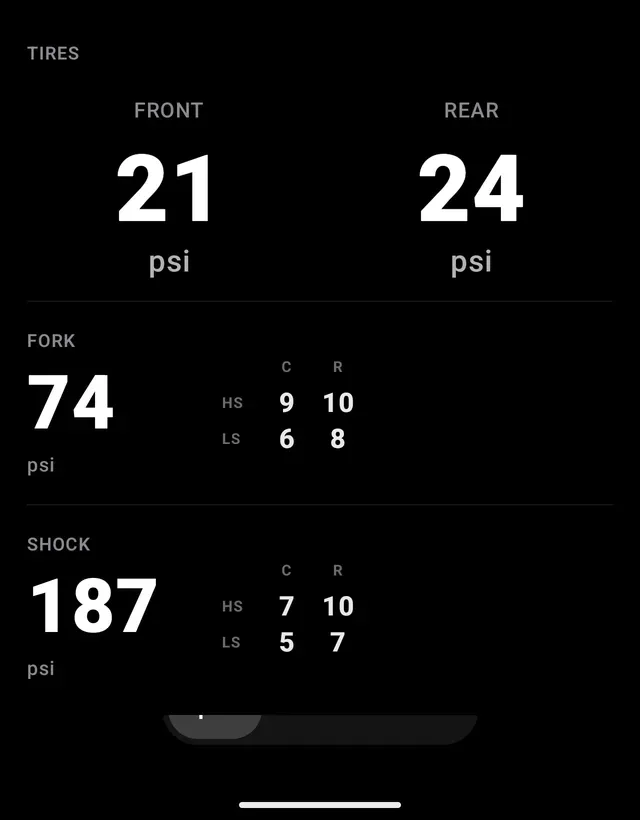 Pump mode keeps the numbers on screen while your hands are busy.
2. Measure sag
Sag is how far the suspension settles under your riding weight, as a share of its total travel. It is the single number that tells you whether the pressure is right for you.
Typical targets, which MTB Mate refines for your bike type and riding style:
| Component | Target sag | Feel |
|---|---|---|
| Fork | 15–20 % | Less sag = more support in steep terrain |
| Shock | 25–30 % | More sag = more grip, more plush |
The method, called the O-ring method:
- Push the O-ring on the stanchion (or shock shaft) down against the wiper seal.
- Get on the bike in your kit. Lean against the wall, stand in your attack position, then sit or stand the way you actually ride. Settle for five seconds. Do not bounce.
- Step off carefully without compressing the suspension further.
- Measure the gap between the seal and the O-ring in millimetres.
- In MTB Mate, open Measure sag on the fork or shock card and enter the number. The app converts it to a percentage and tells you whether you’re on target.
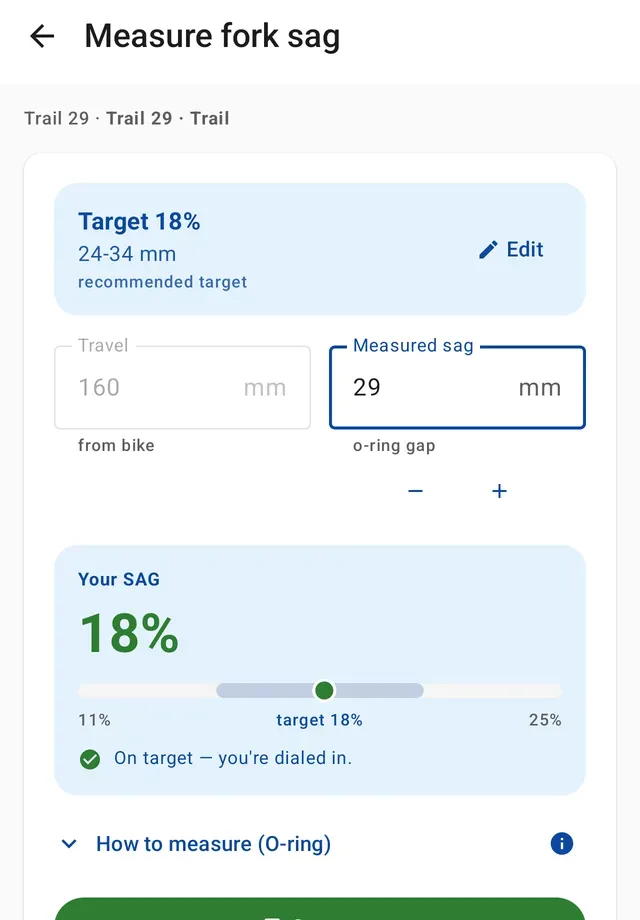 Travel comes from your bike; you enter the gap.
Too much sag: add 5 psi and measure again. Too little: bleed 5 psi. Two or three rounds usually lands it. Save the measurement so the app remembers where you ended up.
Shock sag on a full-suspension bike is measured on the shock’s own stroke, not on rear-wheel travel. MTB Mate does this for you as long as the stroke is entered on your bike.
3. Set rebound
Rebound controls how fast the suspension extends after a hit. Too fast and the bike pogos and kicks you off line. Too slow and it “packs down” over successive bumps, riding low and harsh.
- Start from the manufacturer’s recommended rebound for your pressure. Fox and RockShox print it on the fork leg or in the setup chart for your model; higher air pressure needs more rebound damping, which is why the chart is indexed by psi. If you have no chart, count the clicks from fully closed to fully open and start in the middle.
- Test it on something safe and repeatable: roll off a kerb seated at walking pace, eyes ahead, and feel for a second bounce. Better still, have a friend watch the fork while you do it.
- If it bounces more than once, slow the rebound one click. If it feels dead and the bike stays low between bumps, speed it up one click.
- Do the same for the shock, from its own chart. Fork and shock click ranges are not comparable, so set each one on its own merits rather than by offset from the other.
Write down the clicks. MTB Mate’s setup keeps compression and rebound clicks per component next to the pressures, so the next time you rebuild or lend the bike, the settings are one tap away.
4. Compression, only if you need it
Compression damping resists the suspension squashing. Low-speed compression covers body-weight movements: cornering, braking dive, pumping. High-speed covers sharp square-edged hits and landings.
Most riders never need to touch it after the three steps above. If you do:
- Diving under braking or wallowing in berms — add one or two clicks of low-speed compression.
- Harsh over small fast chatter — remove low-speed compression, or check that rebound isn’t too slow first.
- Bottoming out on big hits although sag is right — first use the bottom-out or high-speed compression adjuster if your component has one. If it doesn’t, or that isn’t enough, add a volume spacer: it makes the last part of the travel ramp up harder without changing your sag. Spacer counts and the fitting procedure are model-specific, so check the service manual for the maximum before you open anything.
- Never using full travel on the biggest hits you ride — check that pressure and compression aren’t simply too high first. If sag is right and compression is open, remove a spacer.
Then ride, and let the app finish the job
The first ride tells you what the workshop can’t. Come back to the Home screen and tap how it felt: Harsh, Dialed or Plush. If it wasn’t dialed, say where, and MTB Mate proposes one change with the clicks spelled out. Apply it, ride again. Every change goes into the setup’s timeline so you can always return to what worked.
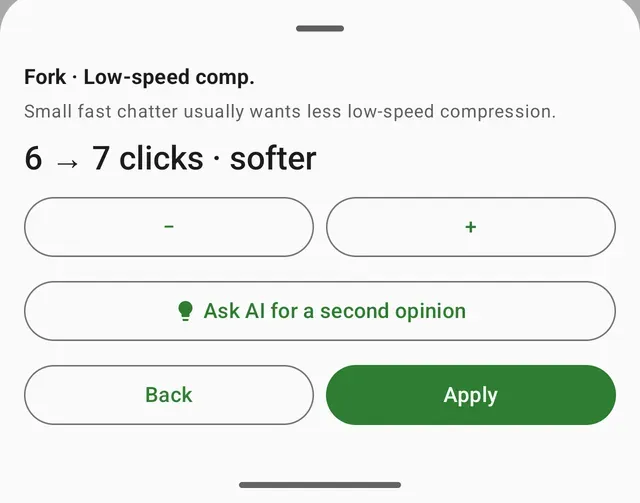 One change at a time is the whole trick.
Quick reference
| Symptom | First thing to try |
|---|---|
| Sag too high | +5 psi, re-measure |
| Sag too low | −5 psi, re-measure |
| Bike bounces after hits | Rebound 1 click slower |
| Rides low and harsh over repeated bumps | Rebound 1 click faster |
| Dives when braking | Low-speed compression +1–2 clicks |
| Bottoms out, sag correct | Bottom-out / HSC adjuster first, then add a volume spacer |
| Never uses full travel | Check pressure and compression, then remove a spacer |
Check pressure every couple of weeks. Air springs lose a little over time, and a five-psi drift undoes all of the above.